Gluten-Free Bread
This post may contain affiliate links. Read our disclosure policy.

This Gluten Free Bread is hands down the best gluten free bread I’ve tried yet. Good gluten free bread is one of the hardest things to find if you are on a gluten free diet but this one is truly satisfying. It’s so tasty and has a great texture.

The Best Gluten Free Bread Recipe
Several months ago, I did the gluten free diet myself for a few months and some of the breads I would buy scared me.
When going gluten free, I think one of the best recipes to have is a good gluten free bread recipe, because it’s a staple pantry item and when you have that it makes being gluten free seem a bit easier.
I tried a few recipes for gluten free bread and this is definitely the one I liked most.
My whole family actually loved it, and my husband couldn’t get over how good it was. He even said he liked it better than regular white bread, believe it or not. He likes that it has more substance to it.
If you are new to gluten-free bread, yes it does have a different texture, which will quickly grow on you. The taste of this bread is amazing! When you eat a piece warm out of the oven it’s so dreamy.
Homemade Gluten Free Bread Ingredients
This easy gluten free bread recipe uses more ingredients than your average loaf of white bread, but I promise every single one is needed to achieve the fluffiest gluten free bread possible.
- Active dry yeast
- Sugar
- Warm water
- Milk
- Canola oil
- Butter
- Eggs
- Lemon juice
- White rice flour
- Tapioca flour
- Potato starch
- Corn starch
- Xanthan gum
- Salt
- Baking powder

How to Make Gluten Free Bread
Making homemade gluten free bread is kind of like making a muffin batter. As in, the consistency will be different from the traditional white flour bread dough, so no kneading is required, wahoo!
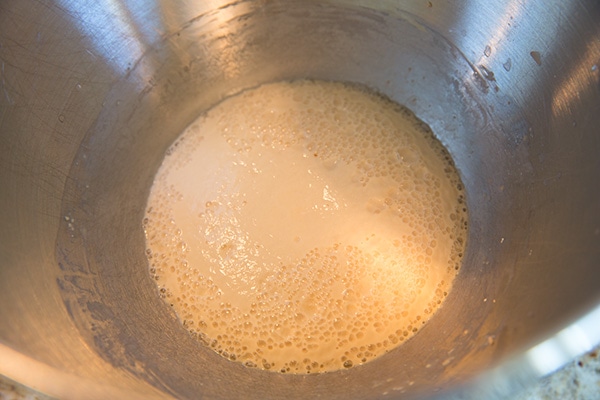
- Pour yeast into the bowl of an electric stand mixer, along with sugar and warm water. Whisk to dissolve yeast, then let rest 5 – 10 minutes to proof yeast.
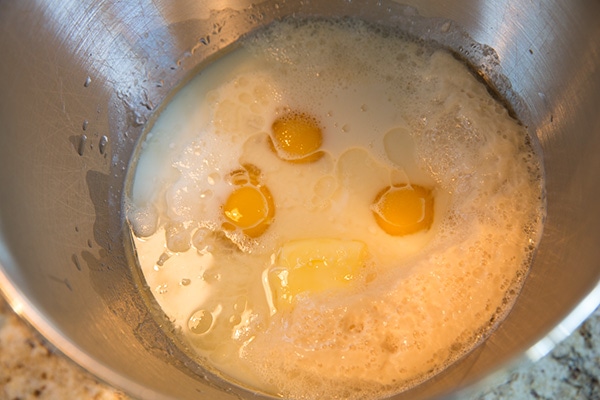
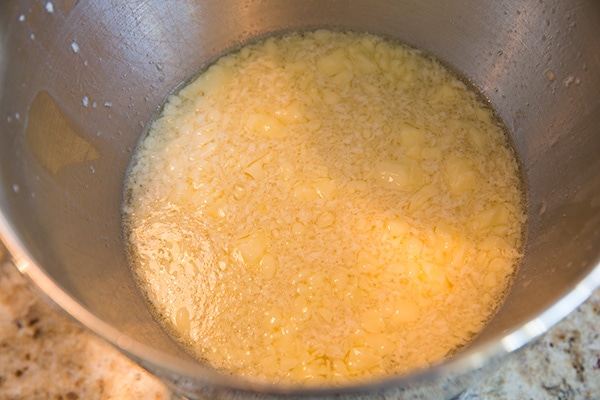
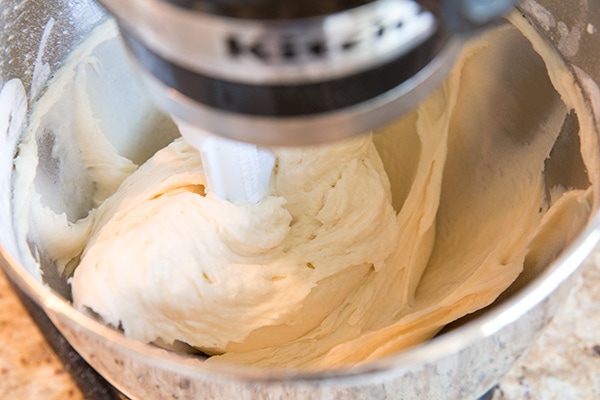
- Add in remaining granulated sugar, the milk, canola oil, butter, eggs and lemon juice. Fit mixer with paddle attachment and whip on low speed to combine.
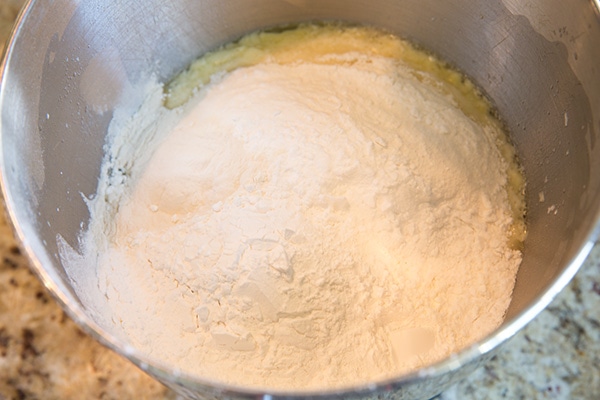
- Add in all remaining ingredients and mix on low speed to combine, then increase to medium speed and mix 5 minutes.
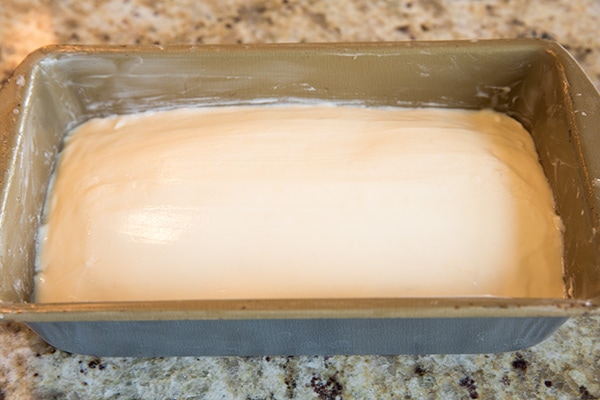
- Pour bread dough into a buttered 9-by-5-inch baking dish and spread to both ends with a rubber spatula. Smooth top with wet hands, while slightly doming loaf.
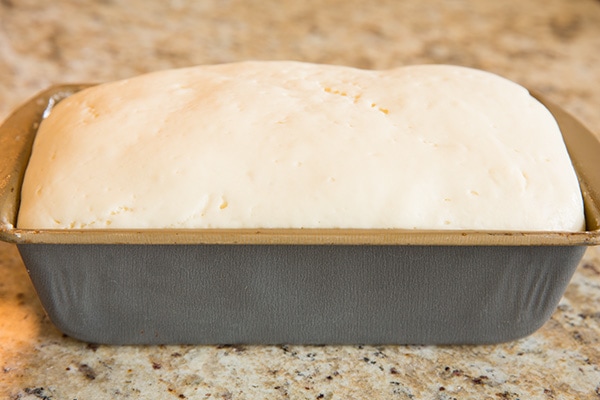
- Transfer to a warm place free from draft to rise for 1 hour to 1 hr 15 minutes. Preheat oven to 375 degrees during last 10 minutes of rising.
- Bake bread in preheated oven for 20 minutes, then reduce oven temperature to 350, tent loaf with foil and bake 20 minutes longer, or until loaf is done (top center of loaf should no longer be doughy).
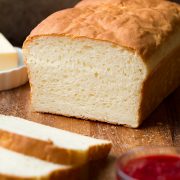
- Cool in loaf pan several minutes, then invert onto a wire rack to cool completely.

Do I Have to Use Xanthan Gum in This White Bread Recipe?
Yes! It offers elasticity in the dough and with the lack of gluten here it acts as the binding agent for the flour. It also helps hold onto some moisture, and gives the bread some structure.
How to Store Gluten Free Bread
This homemade gluten free bread needs to be kept in an airtight container or resealable bag in the refrigerator. Let it cool completely on your countertop before storing in the fridge, though.
How to Serve Gluten Free Bread
Once chilled, I recommend warming each piece for about 10 – 15 seconds in microwave before enjoying it. This homemade white bread will seem dry once chilled in the fridge, but if you warm it up it will become moist again. It’s also delicious toasted!

Tips for the Best Gluten Free Bread
- Scoop and level the dry ingredients when measuring rather than pour them from package into a measuring cup. Just be careful not to pack it when measuring!
- Wet the top of the white bread loaf before setting it aside to rise. Wetting the top prevents it from drying out while it’s rising (you can’t use plastic wrap on this bread since it’ll stick).
- If you have a scale, use that to measure out the ingredients.
More Delicious Gluten Free Recipes You’ll Love:
- 1 Hour Gluten Free Cinnamon Rolls
- Gluten Free Chocolate Chip Cookies
- Gluten Free Banana Muffins
- Gluten Free Brownies
- Gluten Free Buttermilk Pancakes
- Gluten Free Cauliflower Pizza Crust
Follow Cooking Classy
Gluten-Free Bread
Ingredients
- 2 1/2 tsp active dry yeast
- 3 1/2 Tbsp sugar , divided
- 1/4 cup warm water , 110 degrees
- 1 1/4 cups milk , warmed to 110 degrees
- 2 Tbsp canola oil
- 2 Tbsp butter , softened, plus more for bread pan
- 3 large eggs
- 1 Tbsp lemon juice
- 2 cups (320g) white rice flour*
- 1/2 cup (66g) tapioca flour
- 1/2 cup (81g) potato starch
- 1/3 cup (46g) cornstarch**
- 1 Tbsp xanthan gum
- 1 3/4 tsp salt
- 1 tsp baking powder
Instructions
- Pour yeast into the bowl of an electric stand mixer, along with 1/2 tsp sugar and 1/4 cup warm water. Whisk to dissolve yeast, then let rest 5 - 10 minutes to proof yeast. Add in remaining 3 Tbsp + 1 tsp granulated sugar, the milk, canola oil, butter, eggs and lemon juice. Fit mixer with paddle attachment and whip on low speed to combine (butter won't blend in at this point, but it will once dry ingredients are added).
- Add in all remaining ingredients and mix on low speed to combined, then increase to medium speed and mix 5 minutes (if you have the paddle attachment that constantly scrapes bowl I highly recommend it and mix on medium-low speed if using that. If not stop mixer and scrape down sides and bottom of bowl occasionally. Near the end of mixing the batter should have a consistency similar to a quick bread like banana bread).
- Pour bread dough into a buttered 9-by-5-inch baking dish and spread to both ends with a rubber spatula. Smooth top with wet hands, while slightly doming loaf (re-wetting hands in water as necessary. Wetting the top will also prevent it from drying out while it rises since it won't be covered - plastic can easily stick so I don't recommend using it). Transfer to a warm place free from draft to rise for 1 hour - 1 hr 15 minutes. Preheat oven to 375 degrees during last 10 minutes of rising. (Be gentle with loaf once it has risen, it is a delicate loaf so if you tap it too hard on counter or in oven it will likely deflate, so move gently).
- Bake bread in preheated 375 degree oven for 20 minutes, then reduce oven temperature to 350, tent loaf with foil and bake 20 minutes longer or until loaf is done (top center of loaf should no longer be doughy).
- Cool in loaf pan several minutes then invert onto a wire rack to cool completely. Once cool store in airtight container or resealable bag in refrigerator. Slice into 1/2-inch slices.
Notes
- *Scoop and level dry ingredients (vs pouring from package or spooning into measuring cup), just be careful not to pack it when measuring. Better yet, if you have a kitchen scale I'd highly recommend using that.
- **Be sure to use ingredients that are labeled gluten-free to avoid cross contamination of gluten contained ingredients.
- Once chilled, I recommend warming each piece for about 10 - 15 seconds in microwave, or until warm (this bread will seem dry once chilled in fridge but if you warm it up it will be moist again. It's also delicious toasted).
- Recipe Source: adapted slightly from allrecipes